A PICO or Oculus / Meta Quest headset with charged controllers, and a USB cable that supports data transfer.
The computer and all headsets must be on the same local network. Do not use a guest network that isolates devices.
Internet access on the computer to download files and validate the access key.
Free space on the computer and headsets: a large OBB data file is installed in addition to the APK. Updates also need space for a temporary copy.
An access key provided by the administrator or @BlackBarsSupport. Do not share it in a public group.
Before starting, clear the play area, check controller straps and the headset’s built-in safety boundaries. Setting up a virtual map does not replace supervision of the real play area.
02
Prepare the game files
Get the current release from your administrator or support and fully extract the archive onto the computer. Do not run the application from inside the archive.
The BlackBarsLauncher folder contains BlackBarsLauncher.exe, an adb folder and a Versions folder. Keep them together.
Versions contains separate PICO and Oculus builds. Each version folder must contain its APK and matching OBB. Do not rename these files.
The server is separate: Server → version folder → BackBarsGamesServer.exe. Keep all server folders and libraries beside it, including BackBarsGamesServer_Data and MonoBleedingEdge.
Use the server and clients from the same published release. Folder dates help distinguish builds with the same version number.
03
Install on a headset
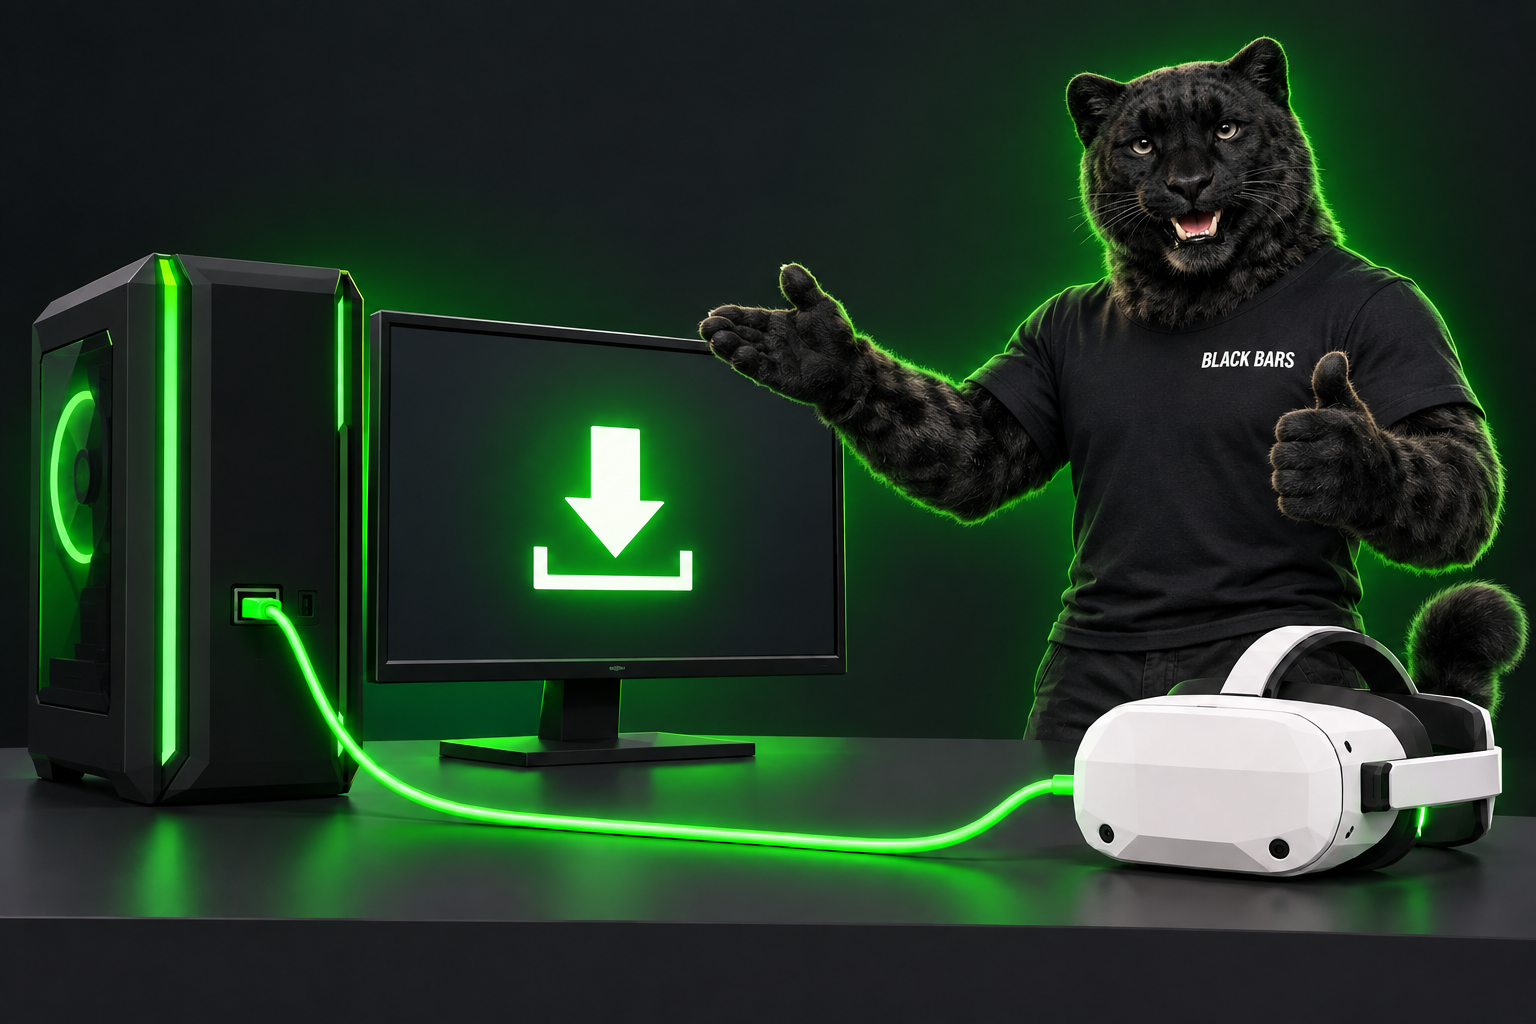
Illustration: USB installation. Connect one headset, allow USB debugging and select it in the launcher. This is a schematic illustration, not an interface screenshot.
Enable developer mode and USB debugging on the headset. If you need help preparing your particular model, contact the administrator or @BlackBarsSupport.
Connect the headset to the computer with a USB data cable.
Put on the headset and allow USB debugging from this computer.
Run BlackBarsLauncher.exe on the computer.
Select the platform: PICO for a PICO headset, or Oculus / Quest for Meta Quest. Select the required build.
Click “Find headsets”. Check that the correct device is selected. For the first installation, connect headsets one at a time.
Click “Install” and confirm the selected device. Wait for APK installation, OBB copying and data-file verification to finish.
Do not unplug the cable until installation is confirmed successful. Repeat for the other headsets.
The launcher does not start the game automatically. After installation, launch it manually from the headset’s library; the name of the unofficial-apps section depends on the firmware. Application names: BlackBarsGamesPICO and BlackBarsGamesQuest.
04
Server and access key
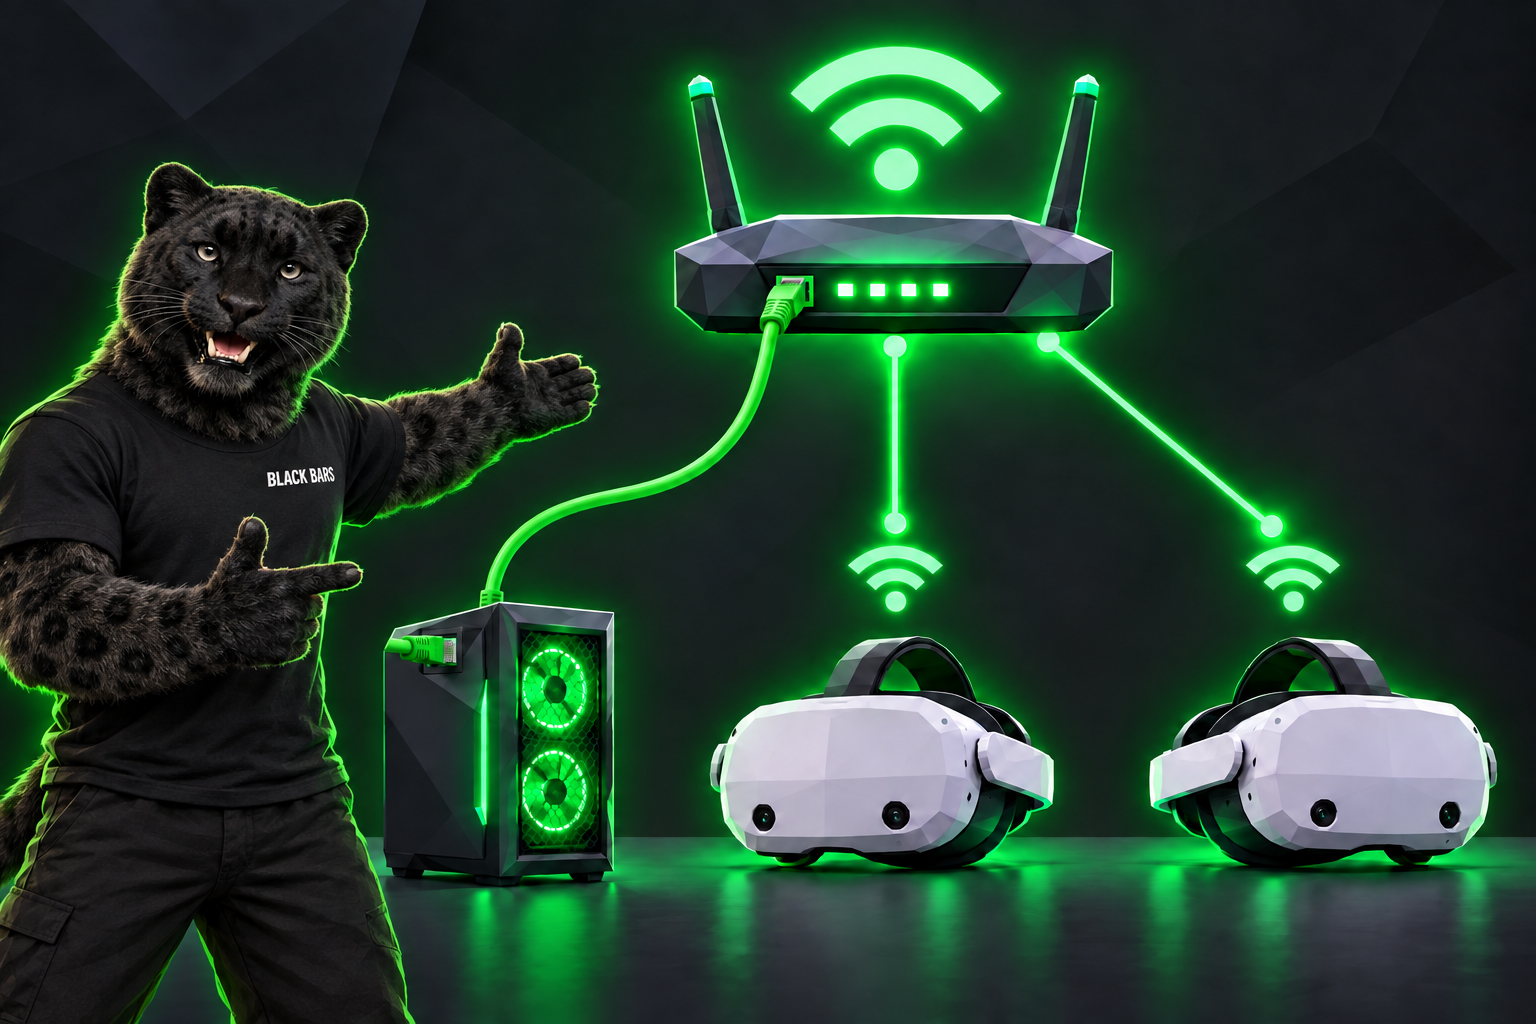
Illustration: the server computer connects to the router by Ethernet, while headsets connect by Wi-Fi. All devices are on the same local network.
Connect the computer and all headsets to the same local network. The computer may use an Ethernet cable to the same router.
Run BackBarsGamesServer.exe from the server folder.
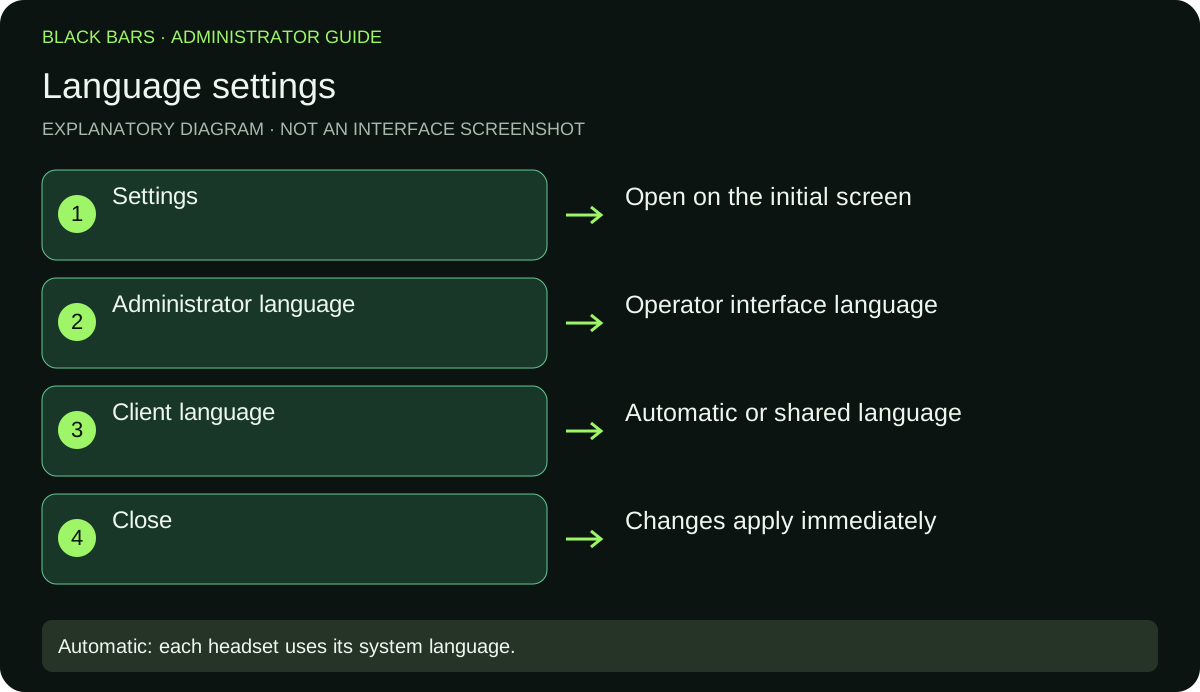
On the initial screen, open “Settings” if needed and choose the administrator interface language. Client language may be automatic or set separately.
If the room has not been configured, complete section 5 and return to the initial screen.
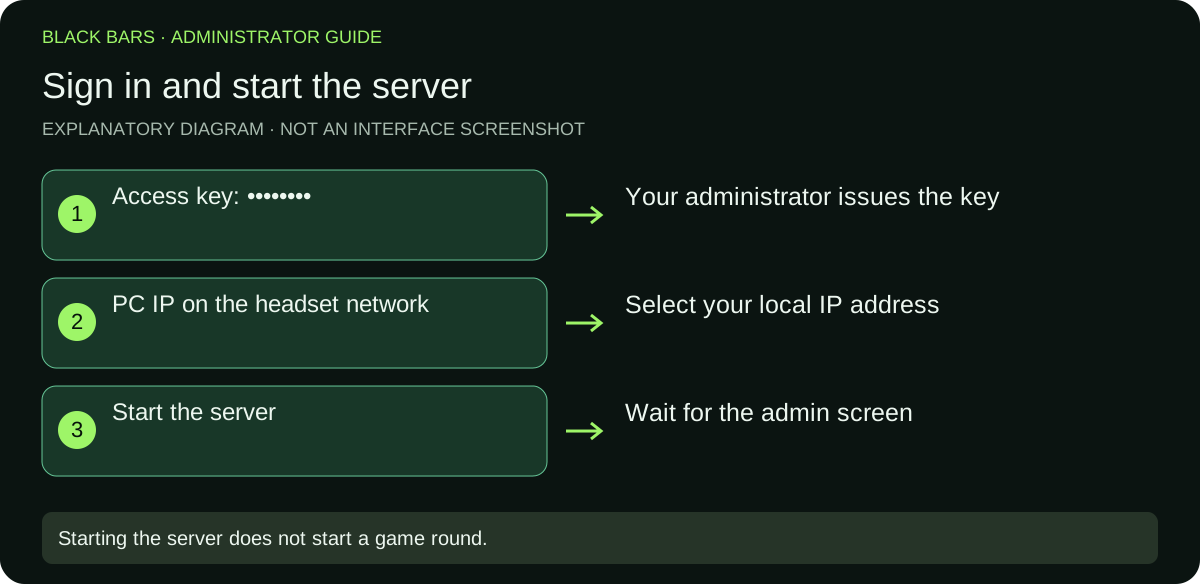
Paste the key from your administrator or @BlackBarsSupport into “Access key”. Make sure the entire key was copied.
From the IP list, choose the computer’s address on the network used by the headsets. If there are several adapters, do not choose a VPN or virtual adapter address. Ask the network administrator if unsure.
Click “Start the server” and wait for key validation and the administrator interface to open.
The key is saved on this computer after successful validation. On later launches, the field may be filled automatically. A saved key is still validated when signing in. If it is invalid or expired, contact the person who issued it; do not try to bypass validation.
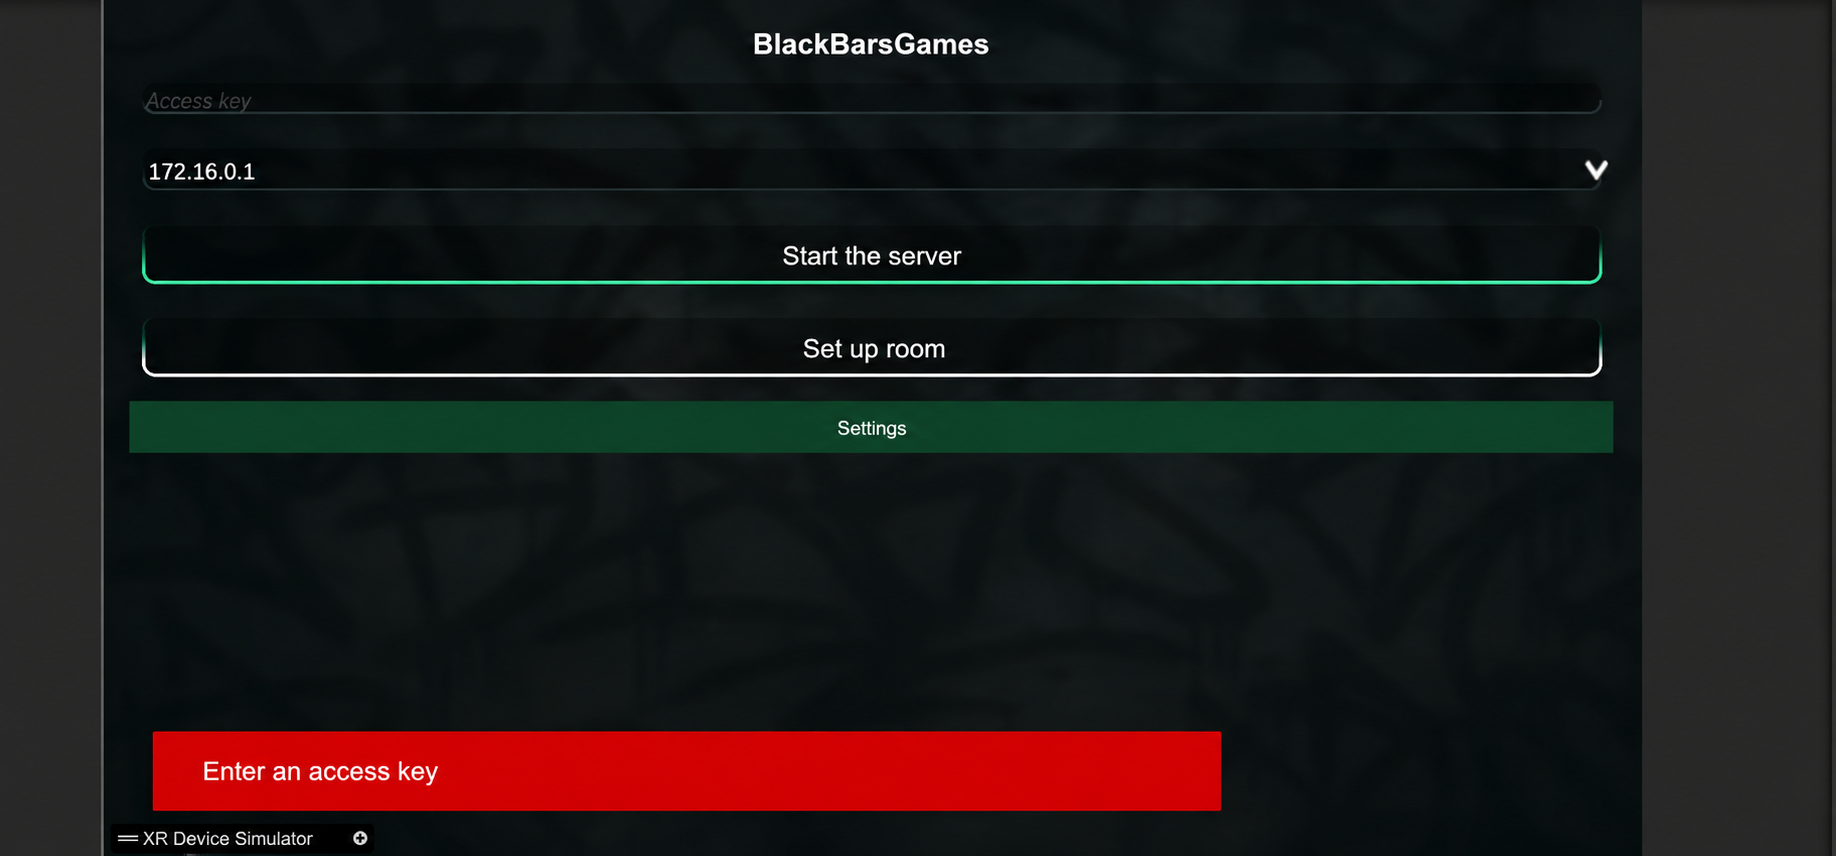
First launch: the initial screen
A reference screenshot from a previous version, with labels translated into English. Colours and layout may differ in your release. The IP shown is an example, not an address to enter.
Access key
Paste the key from your administrator or @BlackBarsSupport. Do not publish it or show it in screenshots. “Enter an access key” means that this field must be filled in.Signing in and starting the server: an explanatory diagram, not a game screenshot. Exact labels and layout depend on the version and language.
IP address list
Select the computer’s local address on the play-area router’s network. Do not copy the IP from the illustration. If VPN, Wi-Fi and Ethernet are connected together, ask the network administrator which adapter to use.
Start the server
Starts sign-in and the server session. Wait for key validation. This button does not start a game round: choose the mode and map after the administrator interface opens.
Set up room
Opens play-area setup: dimensions, walls, columns and service points. Match the real room and finish setup before allowing players in.
Settings
Choose administrator and client languages separately. “Automatic (device language)” lets each headset use its system language. “Close” closes the settings window; language changes apply immediately.Language settings: an explanatory diagram, not a game screenshot. Exact labels and layout depend on the version and language.
Setup sequence for a new play area
Connect the PC to the play-area router by Ethernet and the headsets to its Wi-Fi. Fully extract the game release.
Open BackBarsGamesServer.exe. If needed, select the language in “Settings”.
Open “Set up room” and configure the layout as described below. Do not reuse someone else’s layout without checking dimensions and obstacles.
Return to the initial screen, enter the access key and select the local IP. Click “Start the server”.
Launch the game on the headsets. Calibrate points A/B on each device, then check height and room alignment.
Choose a mode and map and run a short test round. Start visitor sessions only after these checks.
If the key is rejected, check what you entered and contact the issuer. For a connection error, check internet access on the server PC. Do not run multiple server instances for one session.
05
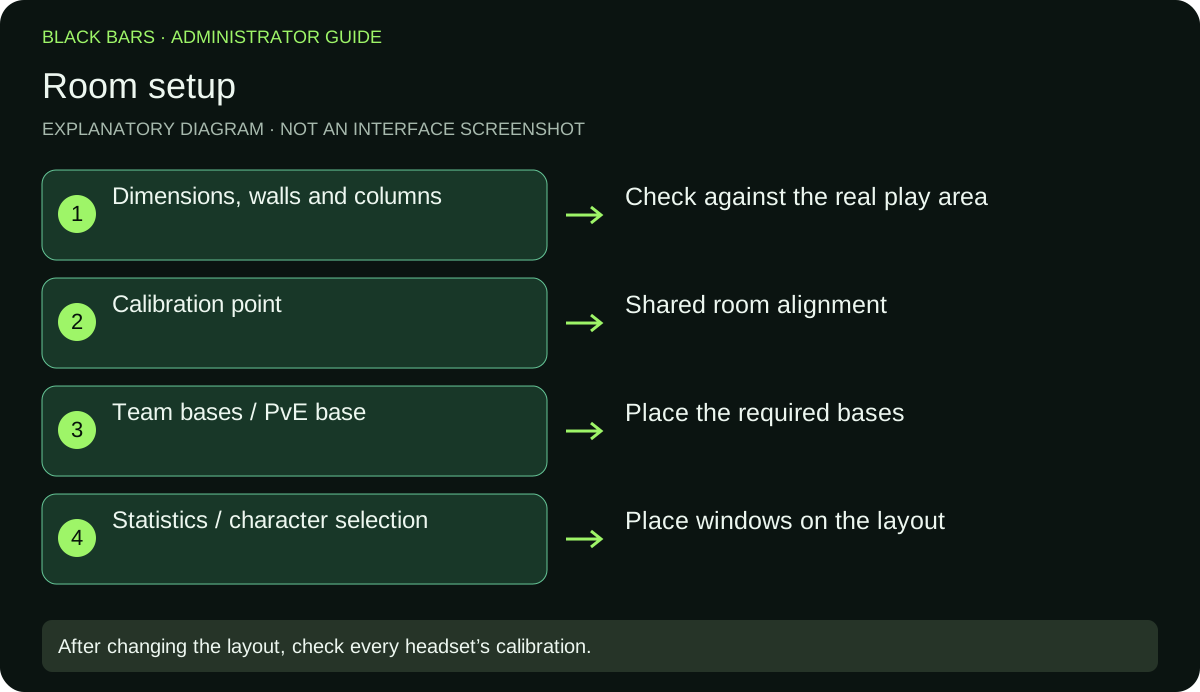
Room setup
This section is for the play-area administrator. For an existing setup, first check that its markings match the current walls and obstacles.
Click “Set up room” on the server’s initial screen.
Enter dimensions that match the real play area, using the values and units shown in the interface.
During wall editing, mark the real walls and columns. Never leave a physical obstacle inside an area shown as clear on the virtual map.
During service-point placement, set the calibration point. Align the floor markings A/B with the virtual layout; they must be the same for every headset.
Place the required points: team bases, the PvE base, statistics and the character-selection window. Select the appropriate tool and its position on the layout.
Complete setup using the finish button. If a save error appears, check the layout and calibration point, then try again.
Return to the server launch screen. Before playing, check virtual-to-real room alignment on every headset.
After changing real walls, columns or markings, check setup and calibration again. Stop the game if they do not match; never test boundaries by walking blindly towards a wall.
06
Calibration
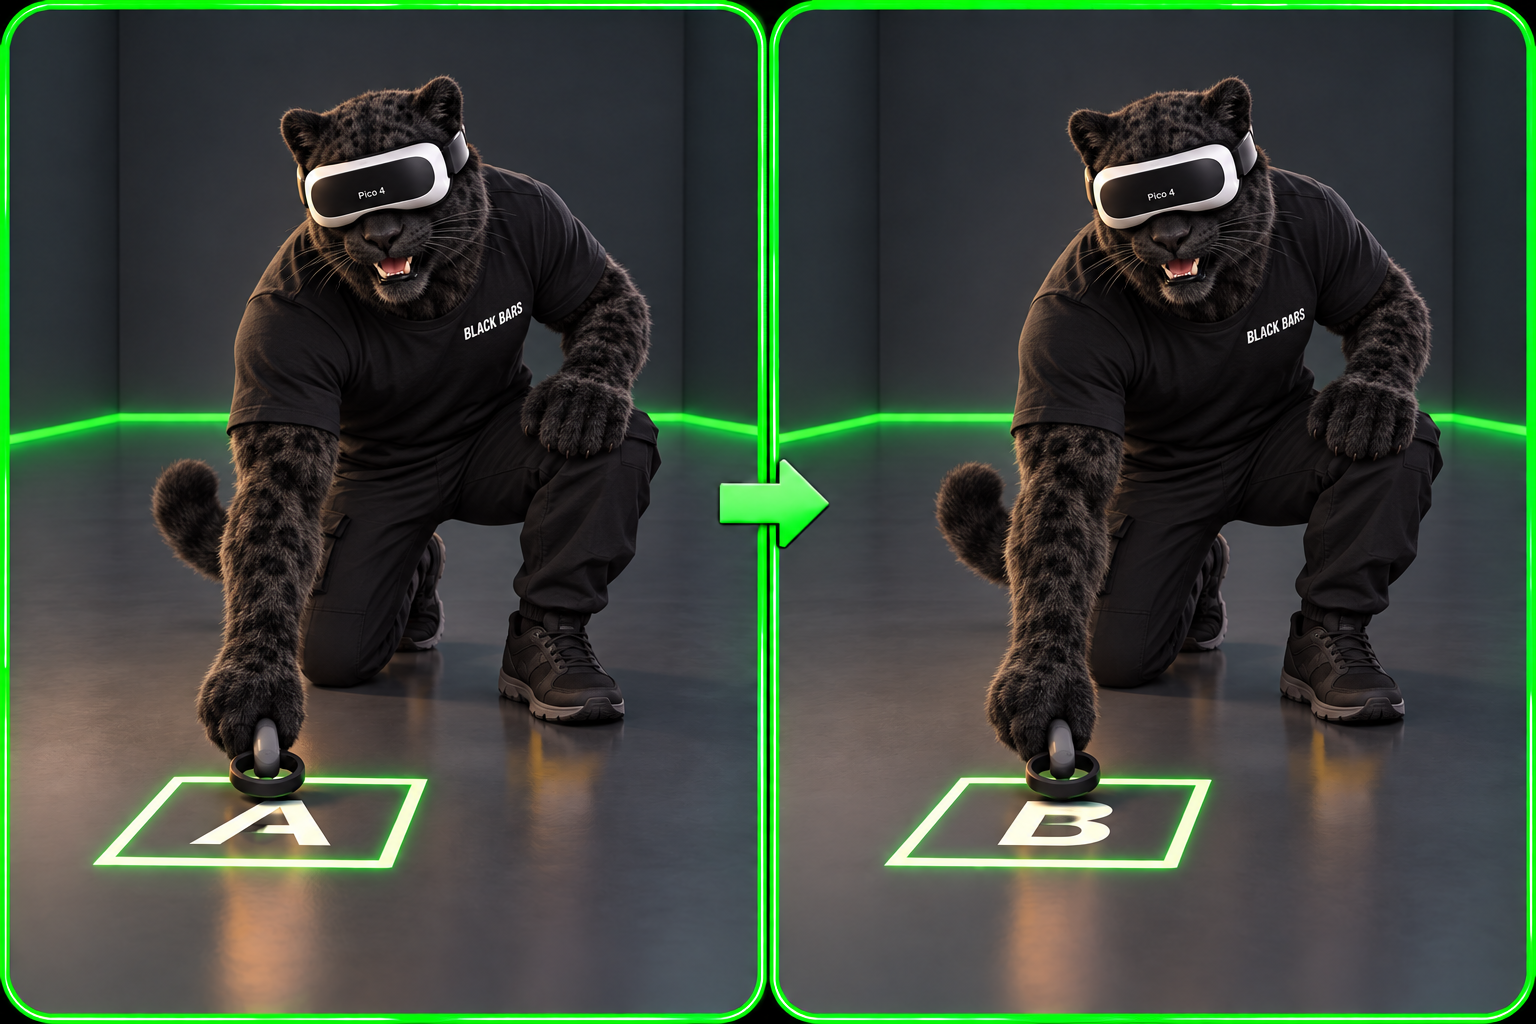
Illustration: point A first, then point B. Use the right controller: press A near the floor at point A, then B at point B. Keep the headset on during calibration. Use your own room’s floor markings.
Make sure the server is running. Open BlackBarsGamesPICO or BlackBarsGamesQuest on the headset.
Wait for automatic server discovery. If it does not connect, see section 10.
If asked for a headset number, assign an unused, unique number. Never use the same number on two devices at once.
Follow the calibration window’s instructions: stand near physical point A.
Carefully lower the right controller to floor level at point A and press its A button.
Place the right controller near the floor at point B and press B. Use the agreed floor markings.
Look around and check with the administrator that the virtual room’s position and direction match the real room. Repeat calibration if necessary.
Finish calibration. The current interface also supports quick completion by pressing the right trigger three times quickly. The headset number must be accepted by the server.
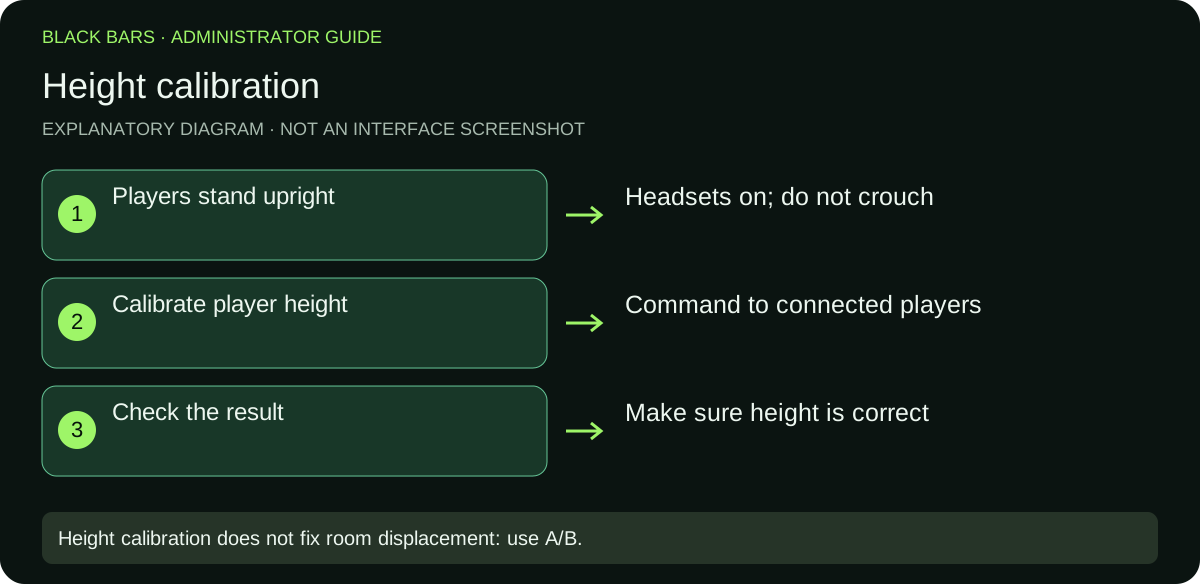
Repeat these checks for all players. If needed, the administrator clicks “Calibrate player height”; players should stand upright while this happens.
You can start recalibration on the client, inside the headset: press A three times and B three times on the right controller. Then calibrate points A and B again as described above.
Room calibration and height calibration are separate actions. Height calibration does not correct displacement or rotation of the entire map.
07
Games and objectives
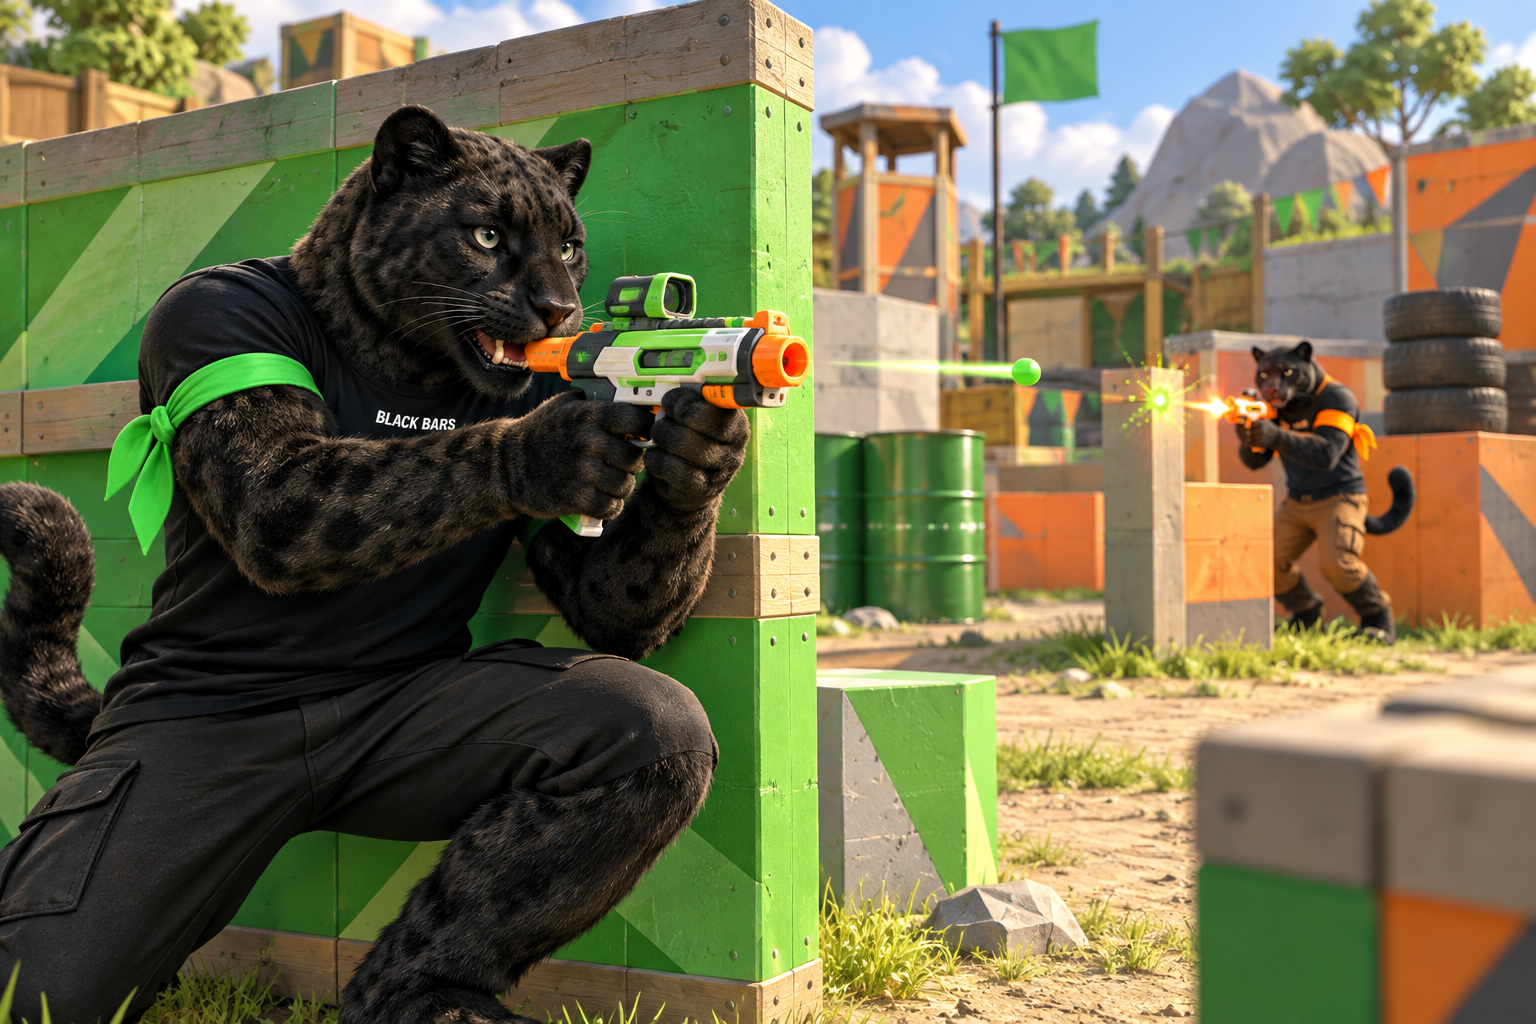
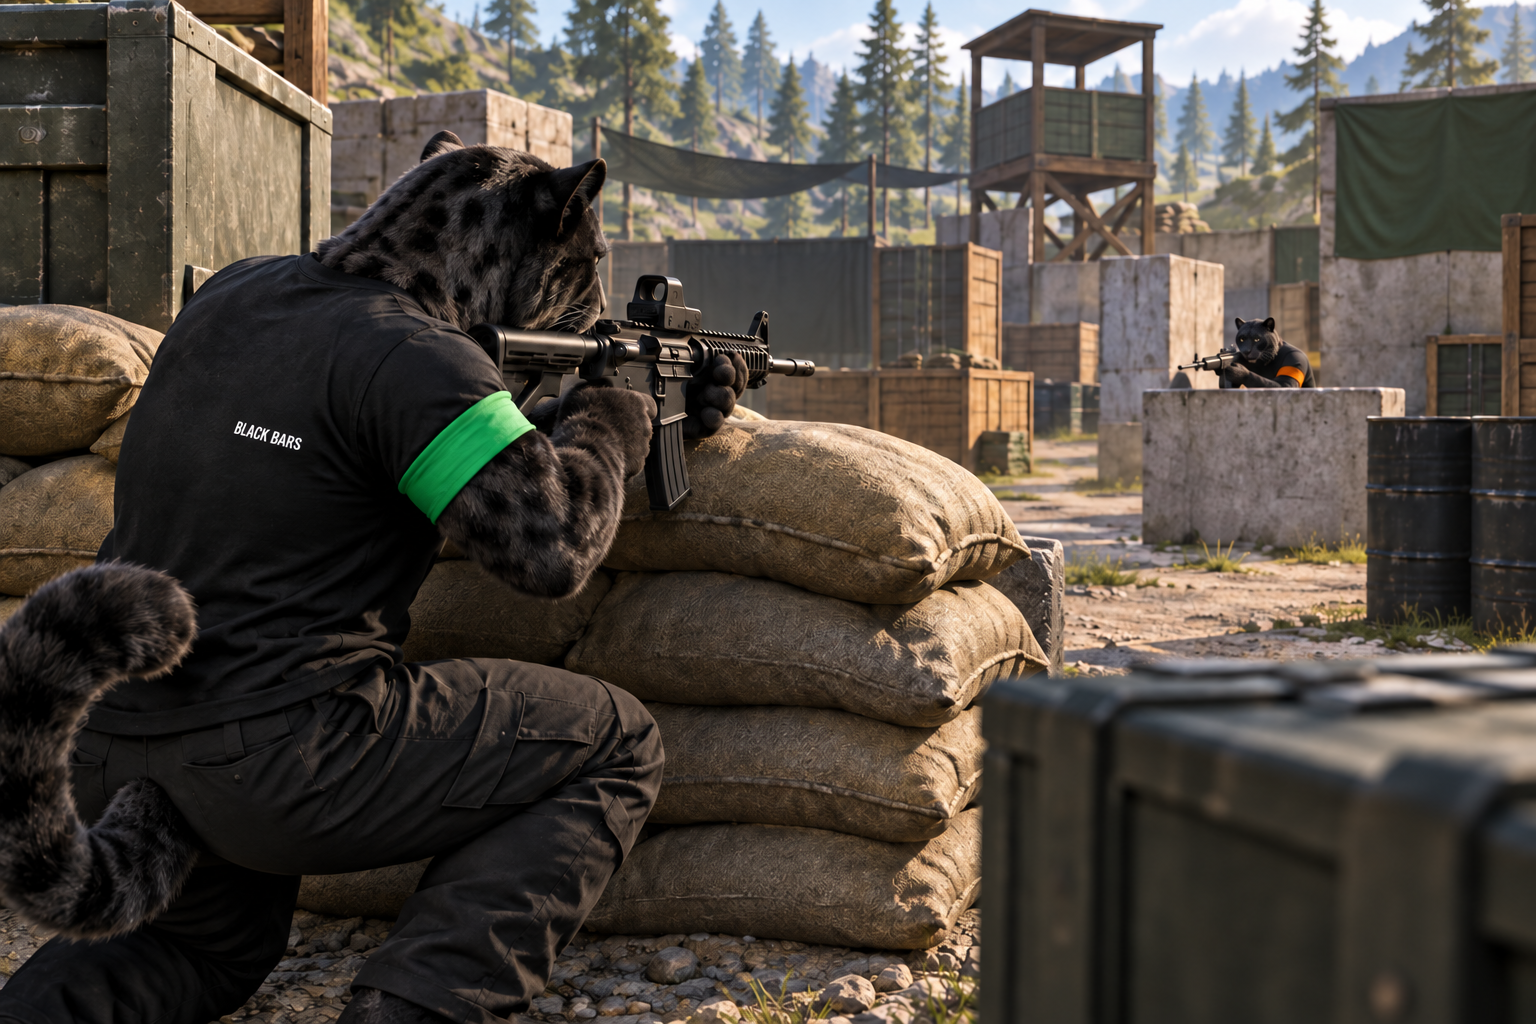
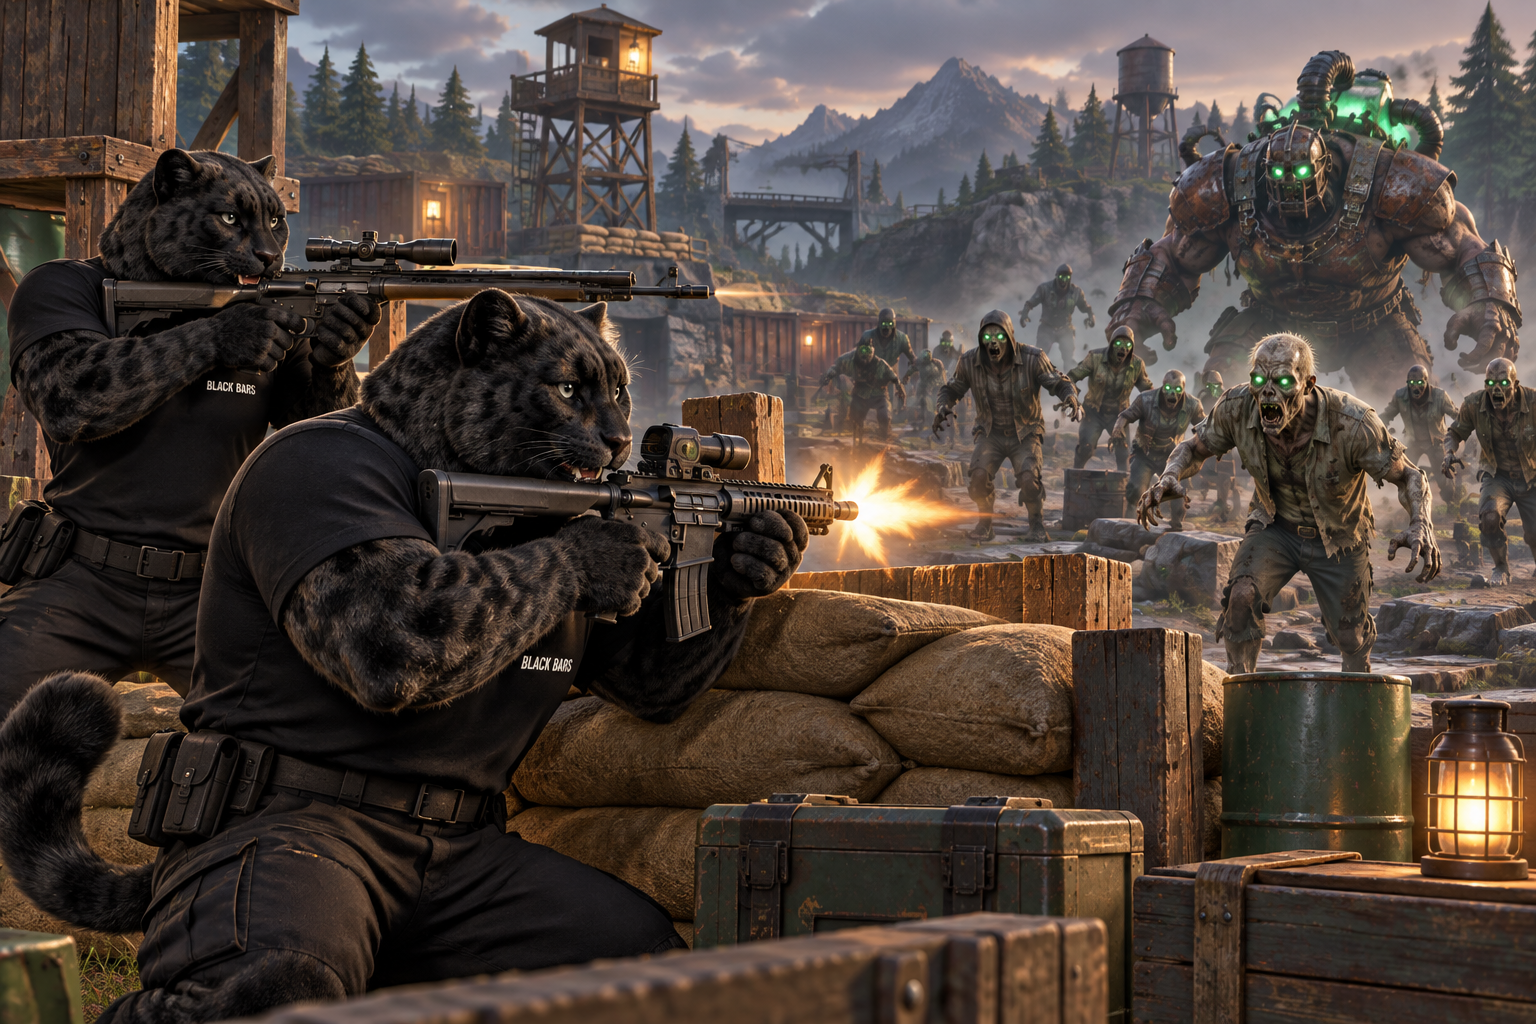
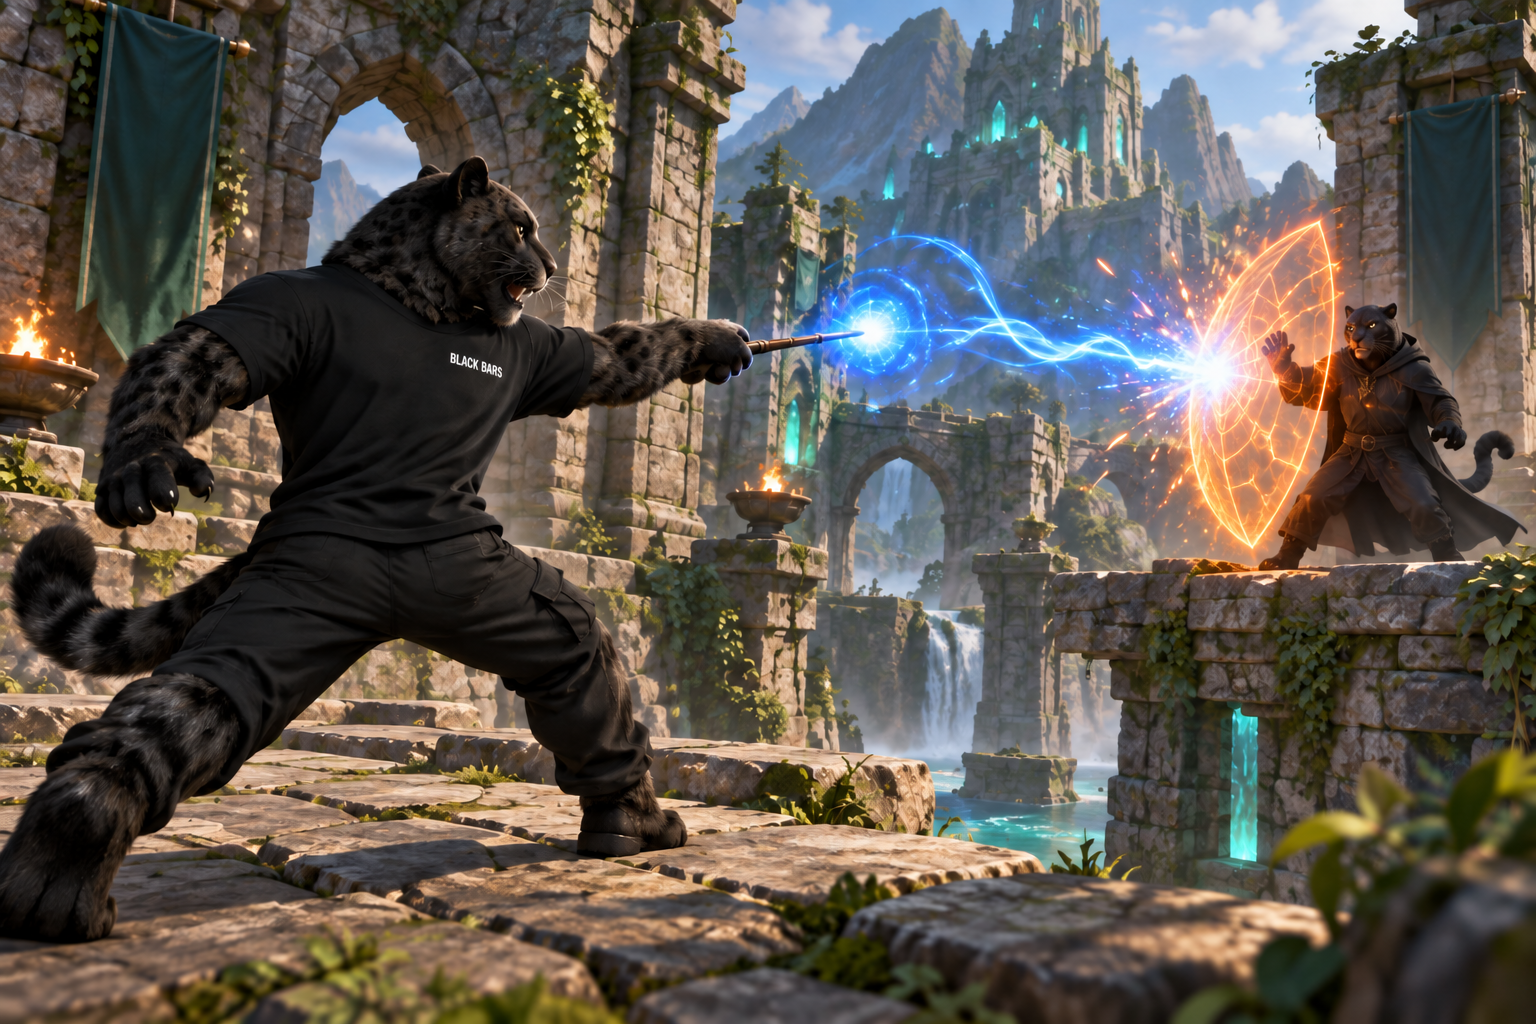
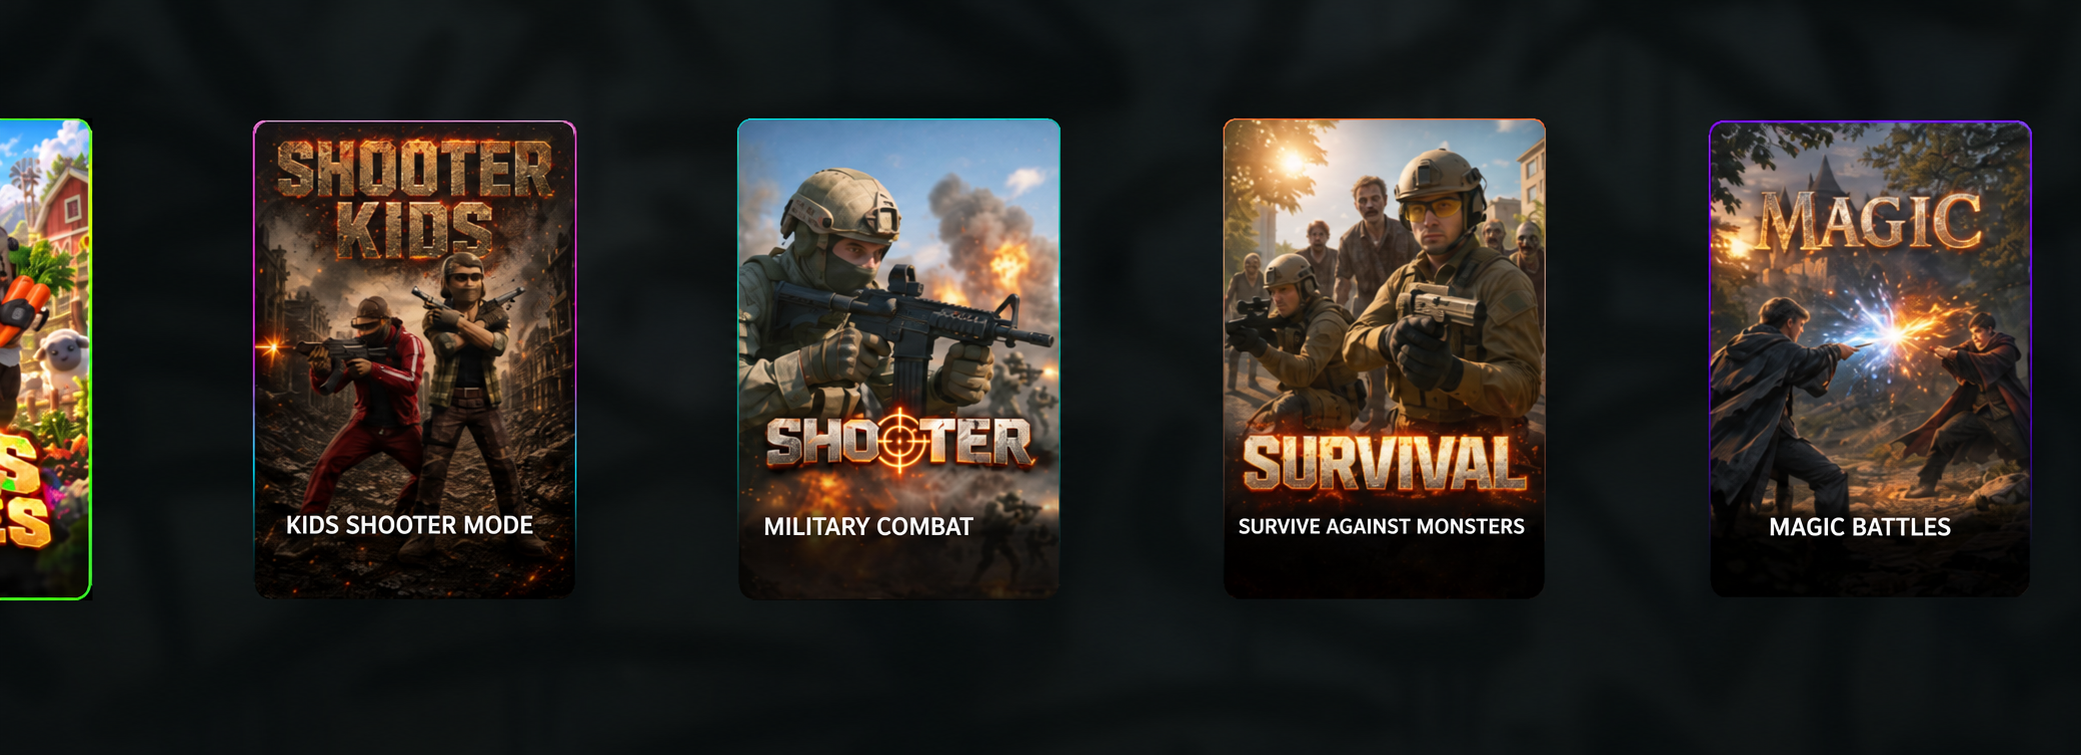
Open the required category in the administrator interface: “Kids modes”, “Shooter Kids”, “Shooter”, “Survival”, “Magic” or “Space”. Availability depends on the build and settings.
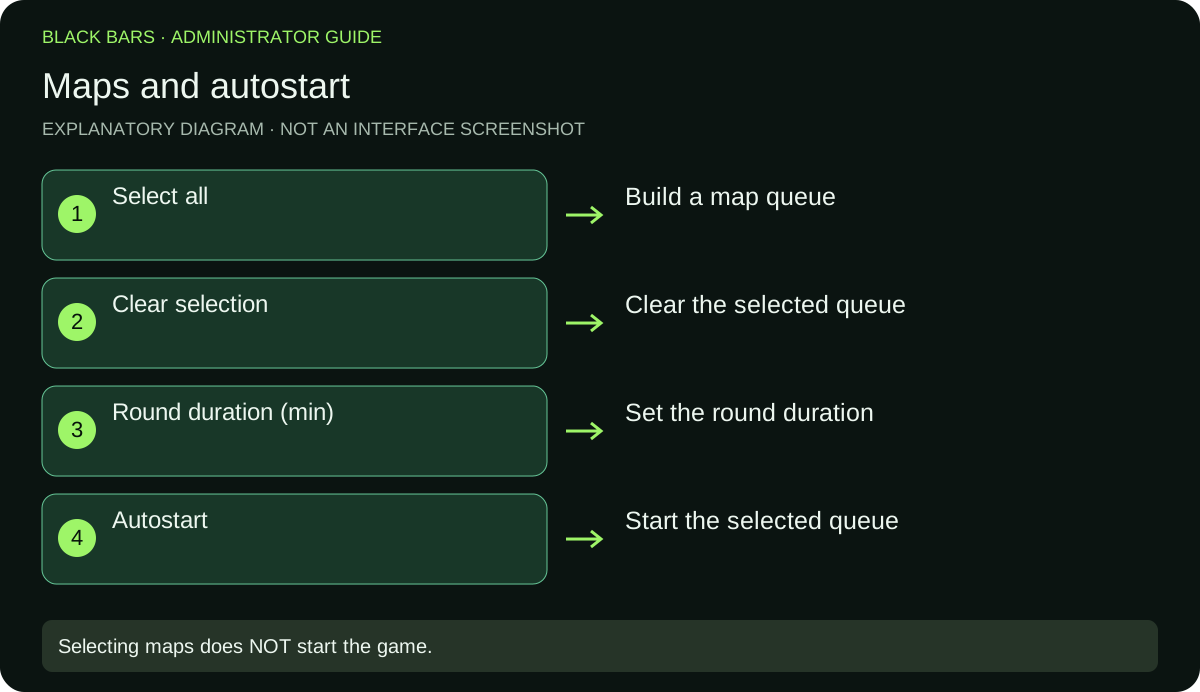
Select one or more maps. Use “Select all” and “Clear selection” for quick selection.
Set the round duration. Use “Autostart” to play selected maps in sequence. Check that at least one map is selected before starting.
Wait for the map to load and for players to be ready. Ask them to remain still during transitions.
If the mode provides a crate or selection window, choose a character, weapon and left-hand item from the available options. Confirm a name change with “Apply” if that button is shown.
Before a full round, test menu selection, weapon or item use, and hand position. Follow the mode’s prompts: controls and available items differ.
CHOOSE YOUR ADVENTURE
Illustrations show the main actions in each mode; they are not gameplay screenshots. Follow the game’s prompts for the specific round objectives.
Color — Paint the map
Paint the map in your team’s colour. The team covering more territory in its colour wins.
Farm — Farming
Plant vegetables. The team planting more within the time limit wins.
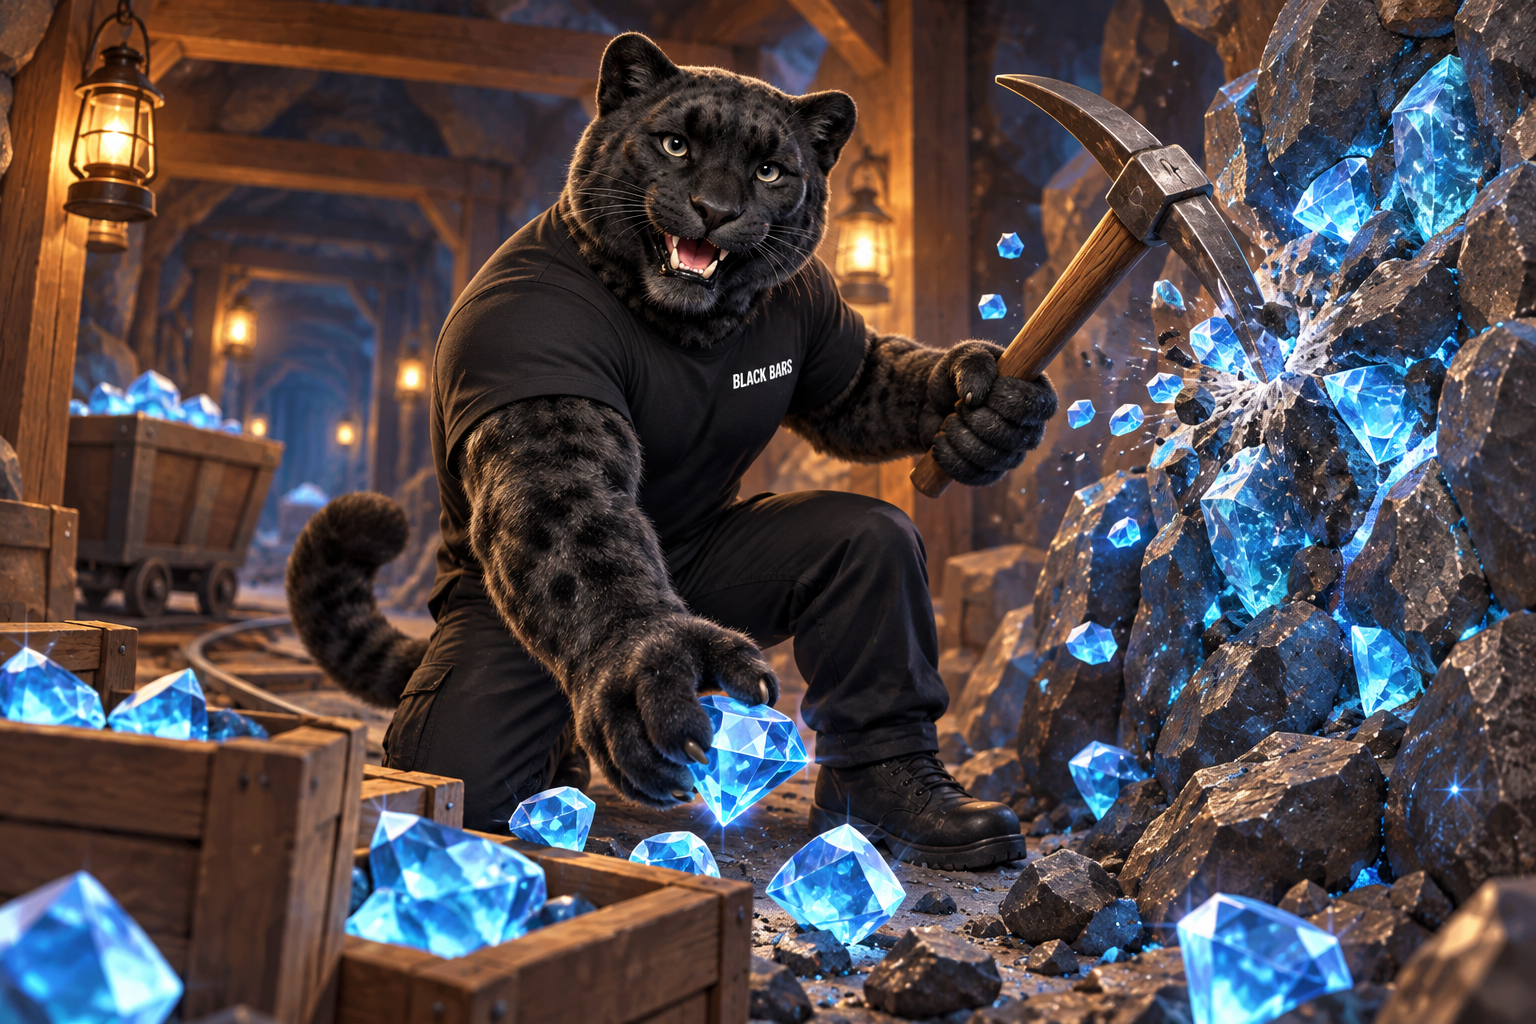
Mining — The mine
Mine diamonds. Follow the current round’s objective and prompts.
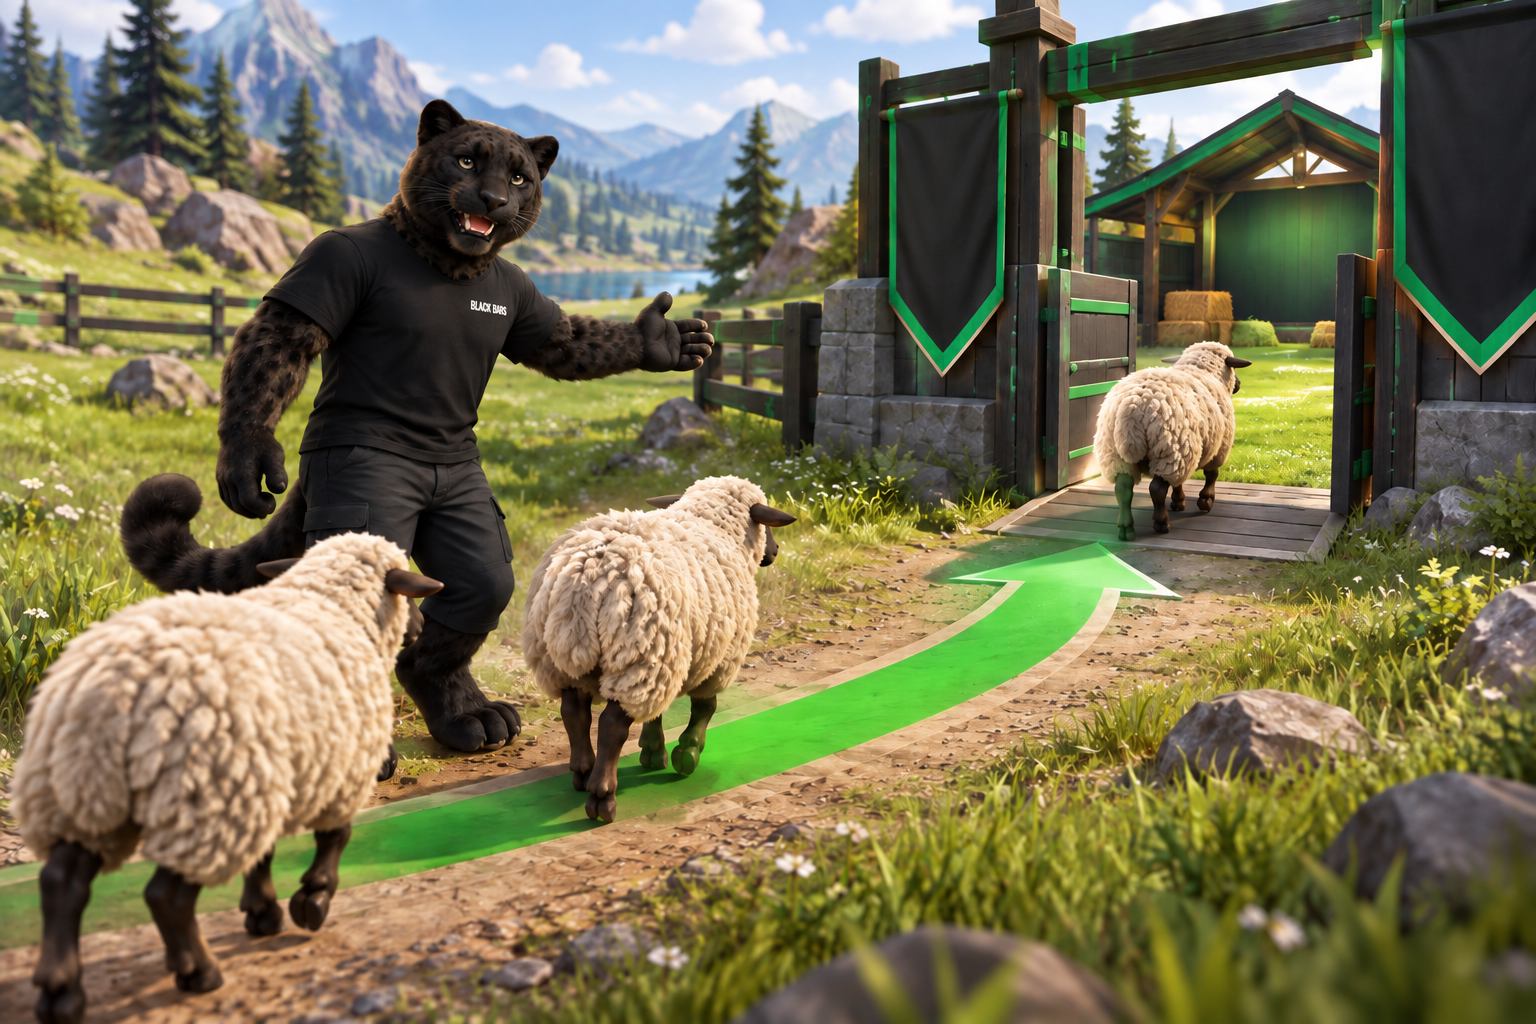
Pasture — Herding
Bring animals to your base. The team bringing more animals wins.
Shooter Kids — Kids shooter
A shooting mode with generated maps. Choose an available weapon and follow the current round’s objective.
Shooter — Combat
Shooting battles. Choose a weapon and an available left-hand item in the selection window.
Survival — Survive the waves
Fight enemies and bosses. Prepare between waves before the next round begins.
Magic — Magical combat
Fight with magic wands. Choose available equipment and cast spells.
Space — Space combat
Space battles with class and equipment selection. Follow the selected mode’s prompts.
08
Administrator controls
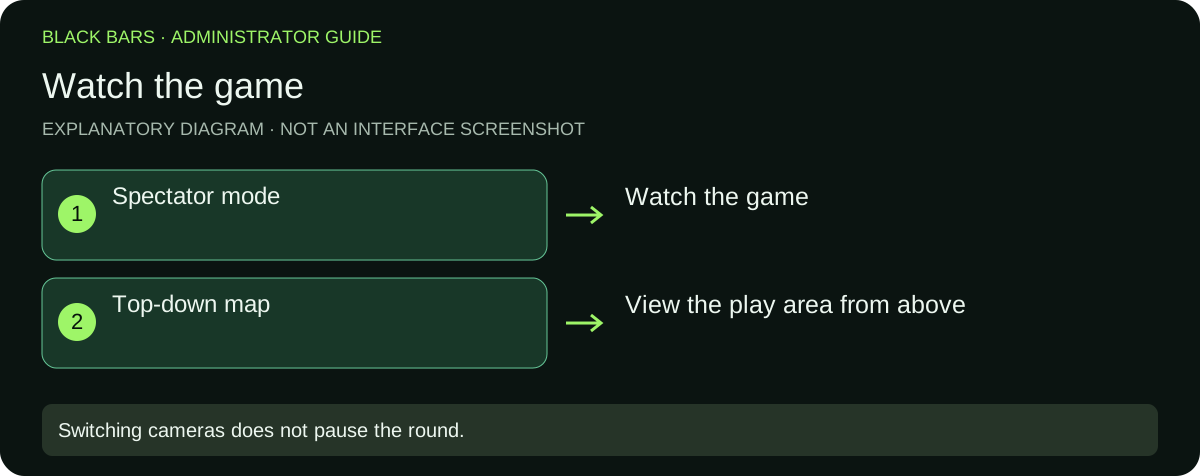
“Spectator mode” — watch the game.
“Top-down map” — view the map from above; generation tools are nearby.
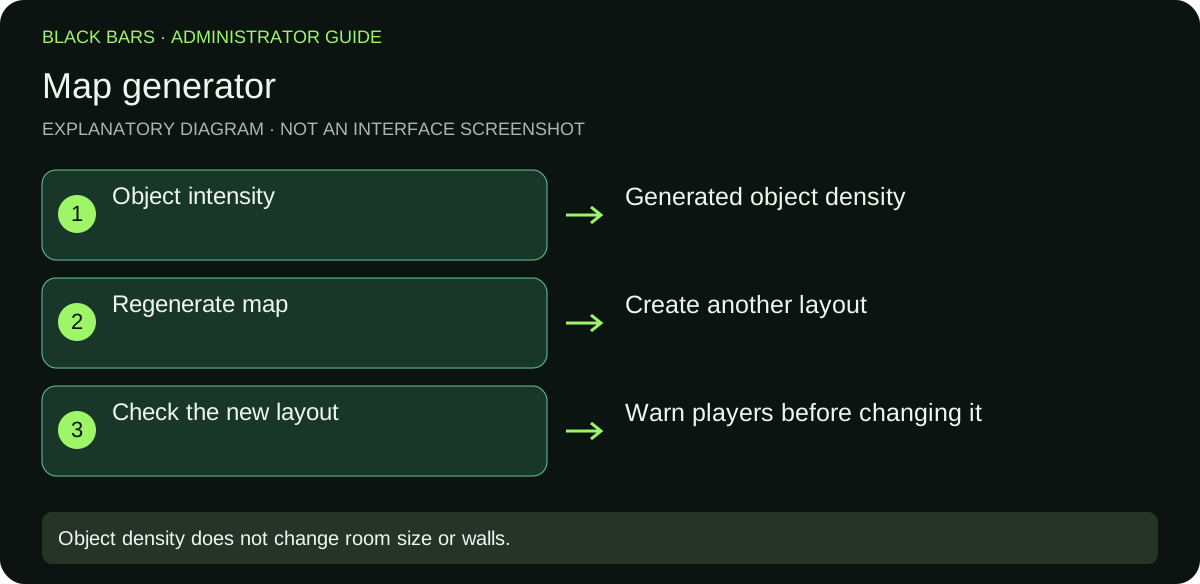
“Regenerate map” — create a new layout for a mode with a map generator. Warn players before changing the map.
“Object intensity” — the number of generated objects, not the room’s size. Real walls and columns must remain represented. Regenerate the map to apply the selected density to a new layout.
“Calibrate player height” — recalibrate players’ height.
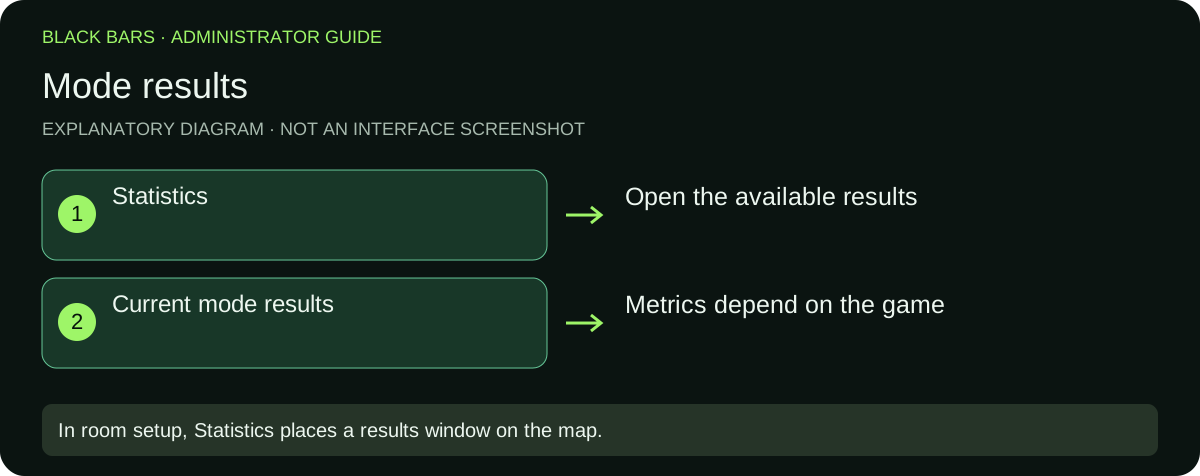
“Statistics” — open the results provided by the current mode.
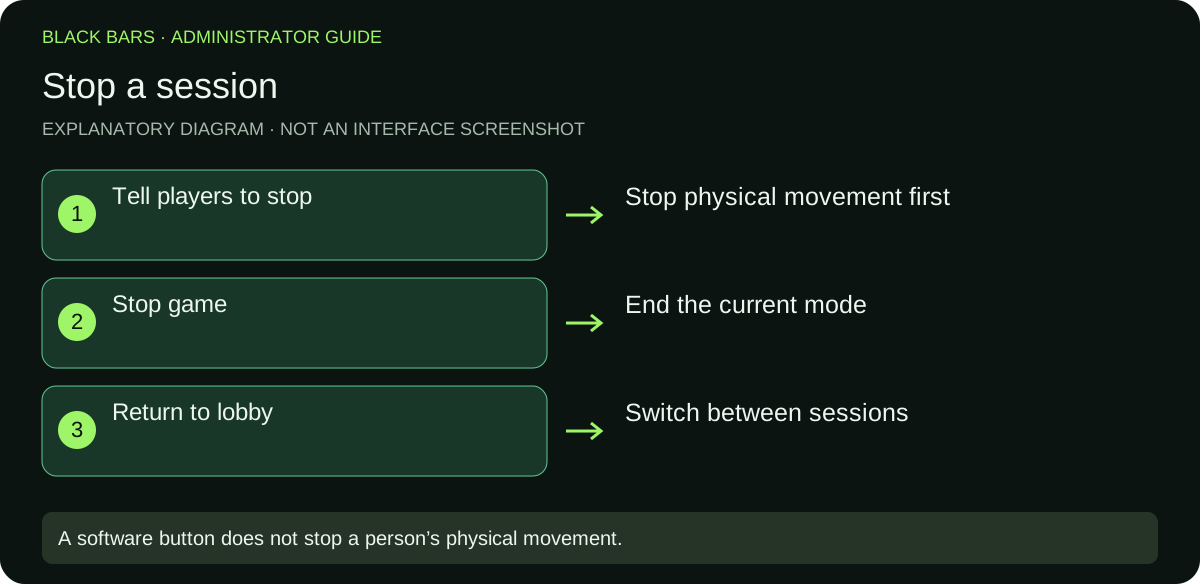
“Stop game” — end the current game. Use before changing settings when players need to stop.
Choose a mode and launch maps
A reference screenshot from a previous version, with descriptions translated into English. Select a mode by its card. Only part of the list is shown; card designs may change.
Open the required mode category first, then work with its maps. To launch one map, use its launch button. Adding a map to the queue is a separate action: selected maps show their sequence numbers.
Select all
Adds the current category’s available maps to the queue. Selecting maps does not start the game.Maps and autostart: an explanatory diagram, not a game screenshot. Exact labels and layout depend on the version and language.
Clear selection
Clears the selected queue. Select the required maps again afterwards. To stop the current round, use “Stop game”, not “Clear selection”.
Round duration (min)
Sets each autostart round’s duration. Check this value before starting the queue.
Autostart
Starts the prepared queue on the server. At least one map must be selected. After a round and its results, the queue moves to the next map.
Return to lobby
Returns to the lobby between sessions. Warn players before switching.
Selected everything, but nothing started? Check the selected maps’ sequence numbers and click “Autostart”. Clicking again while the queue is running does not start a second queue. Do not close the server while a map loads.
Controls during a session
Spectator mode
Switches the server screen to a spectator view. It does not pause the game: continue supervising players and the round.Spectator view: an explanatory diagram, not a game screenshot. Exact labels and layout depend on the version and language.
Top-down map
Enables the overhead camera and centres the view on the map. Use it to monitor players and objects; it does not replace checking the real play-area boundaries.
Calibrate player height
Sends a height-calibration command to connected players. Ask them to stand upright, without crouching or removing their headsets. Correct room displacement using A/B calibration, not this button.Height calibration: an explanatory diagram, not a game screenshot. Exact labels and layout depend on the version and language.
Statistics
Opens the results provided by the mode. Available metrics differ between modes; this is not a map-selection menu.Mode results: an explanatory diagram, not a game screenshot. Exact labels and layout depend on the version and language.
Stop game
Stops the current game mode and ends the tournament session. In a dangerous situation, first tell players to stop: the software button does not stop physical movement.Stopping a session: an explanatory diagram, not a game screenshot. Exact labels and layout depend on the version and language.
Map generator
Map generator: an explanatory diagram, not a game screenshot. Exact labels and layout depend on the version and language.
“Object intensity” controls generated object density. “Regenerate map” creates a new layout: it changes the preview when previewing, or the current generated map during a server game. Warn players and ask them to stop moving before changing it. Object density does not change the real room’s dimensions or remove walls and columns.
Room setup tools
Room setup: an explanatory diagram, not a game screenshot. Exact labels and layout depend on the version and language.
During service-point placement, choose the tool and then a position on the layout:
Calibration point — aligns the virtual room with the play-area markings.
Team bases — separate positions for the two teams.
PvE base — the point used for cooperative modes against enemies.
Statistics — places the results window in the play area; it does not open round results.
Character selection — places the corresponding window in the game room.
Do not change the room layout during an active client session. After changing it, check calibration on every headset again.
Quick checklist before each group
Server and headsets use the same release and are connected.
The play area is clear, and real obstacles are represented in the layout.
A/B calibration, height and unique device numbers have been checked on all headsets.
The required mode is selected; for autostart, the queue and round duration are set.
Players understand the objective and the command to stop immediately.
After a test round, the administrator checks controls and hand position.
Map editor
Open the editor on the server administrator’s computer. Connect the headsets to this server and click “Edit map”.
A grey screen appears with an object-loading message. Wait for loading to finish.
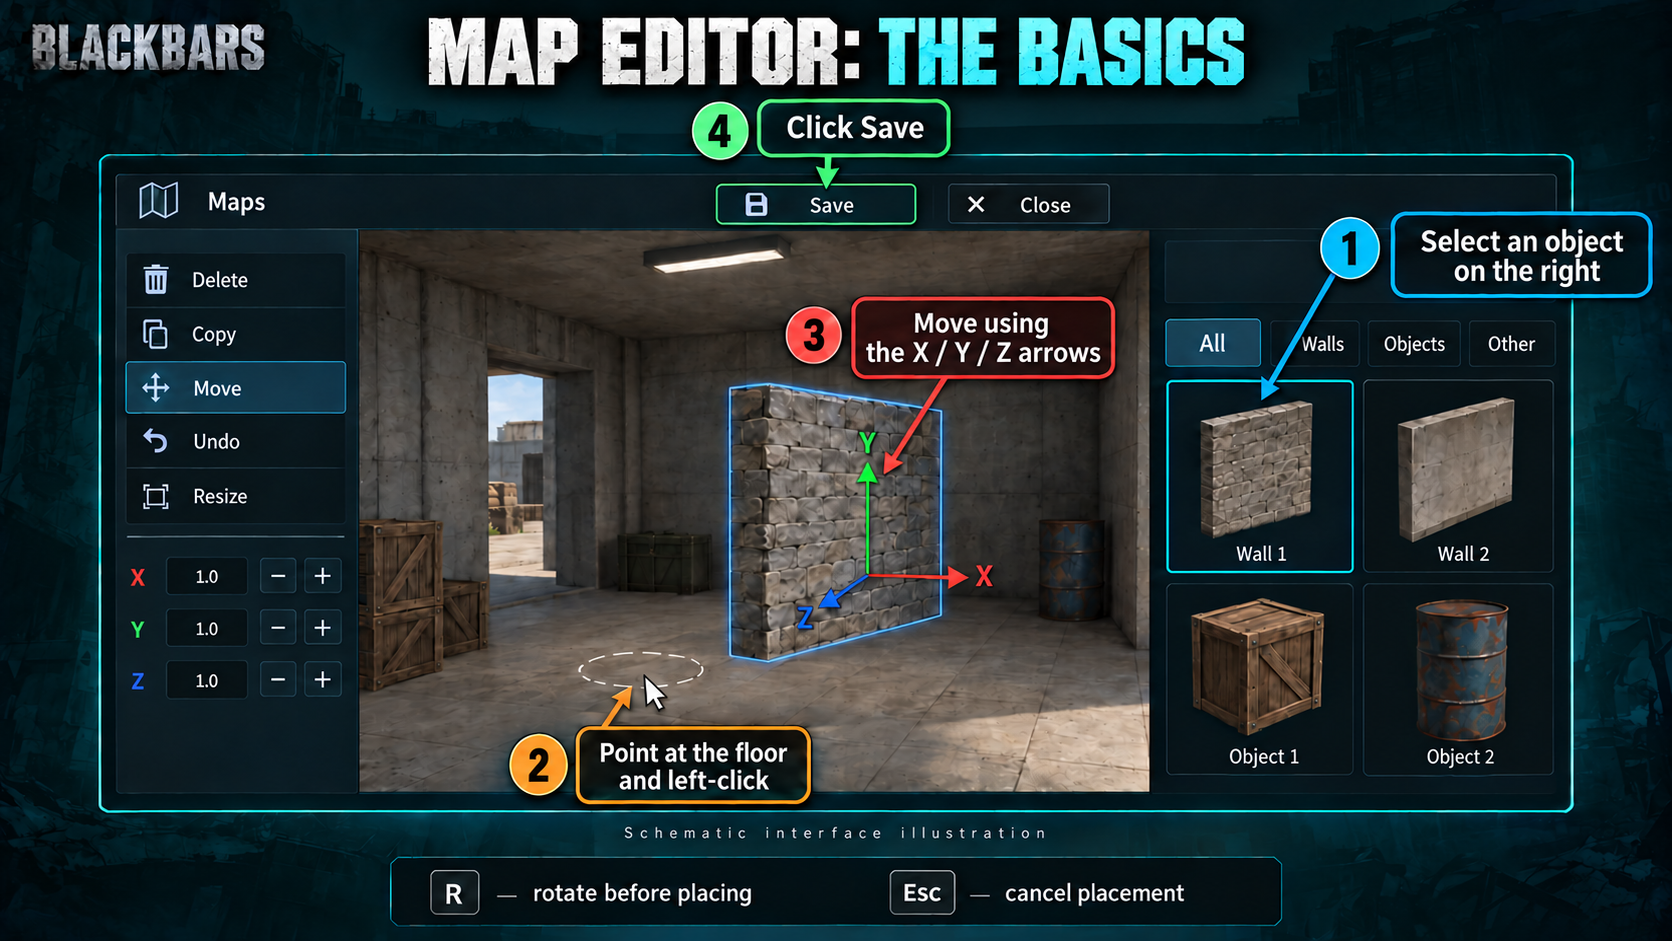
Explanatory illustration: layout and appearance may differ from your game version. Click the image to enlarge it.
Add objects
Choose “Walls”, “Objects” or “Other”. POLYGON objects are in “Other”.
Click the object you want.
Point at the floor and left-click to place it.
Press R to rotate the object before placing it; press Esc to cancel placement.
Edit objects
Click a placed object to select it.
Move
Move the object using its arrows.
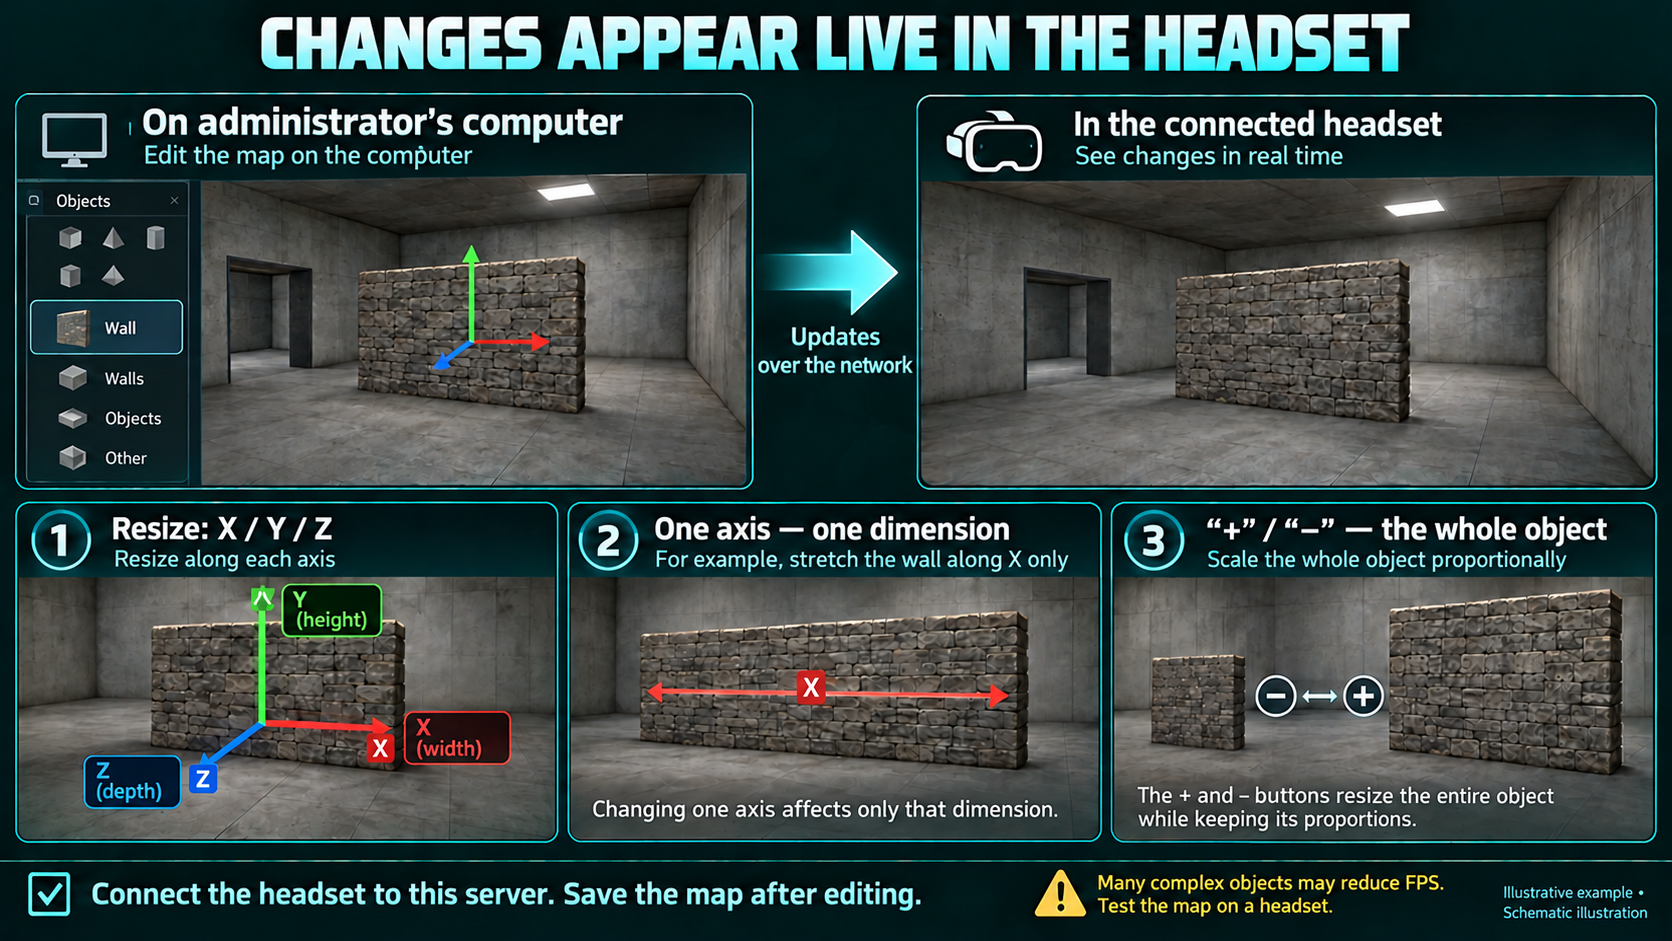
Resize
Change individual X, Y and Z dimensions by dragging the arrows or entering values. Resize axes rotate with the object.
“+” and “−” buttons
Scale the whole object proportionally.
Copy
Create a copy of the object.
Delete
Remove the selected object.
Undo
Undo the last change.
Illustrative example of the appearance and resizing. This is a schematic illustration, not a game screenshot.
Changes are sent to connected headsets immediately while editing: adding, moving, resizing and deleting objects. You do not need to restart the game for each change. An unstable connection may cause delays.
After editing, click “Save” to save your map changes. Then click “Close”.
Possible problems
Many objects, especially complex models, may reduce headset FPS and increase map-loading time. Add objects gradually and check that gameplay stays smooth.
Oversized or overlapping objects may block paths or views and interfere with player movement.
With an unstable connection, changes may appear on headsets with a delay.
The first load of the catalogue or a selected model may take time; wait for it to finish.
Remember to click “Save”: seeing changes on headsets does not mean the map has been saved.
09
Language and updates
In “Settings” on the server’s initial screen, select administrator and client languages separately. In automatic mode, each headset uses its system language; the administrator may override client language. Changes should apply without reinstalling the game.
Before updating, finish the session and close the game on the headsets and the server.
Download the new release. Do not mix files from different releases in one folder.
Extract the release and install the matching version on each headset using the launcher.
Wait for OBB copying to finish. The APK alone is not enough.
Run the server from the new release. Before admitting players, check connections, room layout and calibration, and run a short test round.
A normal installation updates the app with the same package name. For signature or version errors, do not uninstall the game or clear its data yourself: contact support first to avoid losing settings.
10
Troubleshooting
The launcher cannot find a headset
Check the data cable, battery and USB port. Unlock the headset, allow USB debugging and click “Find headsets” again. If no prompt appears or developer mode is not configured, contact support.
Installation or OBB error, or not enough storage
Check that the archive is fully extracted, the correct platform is selected and the APK/OBB files are together. Free space without deleting important data. Retry installation and wait for successful OBB verification. For signature errors, downgrades or repeated failures, send the error message to support.
Windows protected your PC: SmartScreen warning
“Windows protected your PC” is a SmartScreen warning about an unrecognised application. It does not by itself mean a virus was detected, nor does it confirm the file is safe.
Fully extract the ZIP into a separate folder. Run BlackBarsLauncher.exe from that folder, not from the archive viewer.
If the version came from an official link and its safety was confirmed by your administrator or @BlackBarsSupport, click “More info” → “Run anyway”. If that button is missing or a detected threat is named, send a screenshot to support.
Adding a folder to antivirus exclusions does not dismiss SmartScreen: it is a separate check.
Antivirus removes or blocks game files
If antivirus removes game files, first send its warning screenshot to @BlackBarsSupport. Once the downloaded version is confirmed safe, exclude only the BlackBarsGames folder containing the game and launcher, then extract the archive again.
An exclusion disables scanning inside that folder. Use only official links from your administrator or support, and do not place unrelated files there.
The key is not accepted
Check the entered key and the computer’s internet connection. For a connection error, wait for the network to recover and retry. If the key is rejected, contact the administrator or @BlackBarsSupport. Do not post the key in a public chat.
The headset does not connect to the server
Check that the server is running, releases match and all devices are on the same local network. Make sure the correct IP is selected. Guest networks, client isolation, VPN or firewall rules may prevent discovery. Ask the network administrator to check application access; do not disable all computer protection.
Misaligned map, incorrect height or hands
Stop the game. Repeat room calibration for a displaced map; use the separate height-calibration button for height. If only one weapon or character has a problem, report its name and include a video.
Freezing, low FPS, missing objects or textures
Record the headset model, mode and map, build version and when the problem occurs. Check that installation finished without errors. Do not run visitor sessions with broken visibility or mismatched boundaries; contact support.
Your administrator or support issues the access key.
Headset model and game version / build-folder name.
Mode and map where the problem happened.
What you did before the error and what appears on screen.
A photo, video or the exact error message. Never show an access key in screenshots.
Before the first session: the server has signed in with its key; all headsets are connected; device numbers are unique; room and height calibration are checked; the map and duration are selected; a test round completed without problems.
 BLACK BARSGAME GUIDE